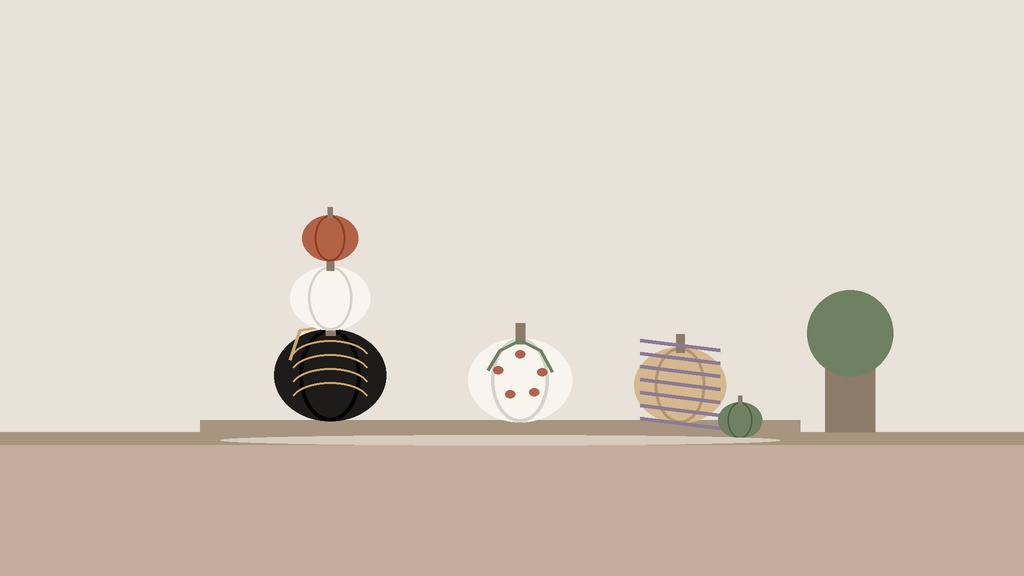
A carved pumpkin has a short life. Cut one open on Monday and it is soft and sagging by the weekend, and by Halloween night it can look like a jack-o’-lantern that has seen a few things. No carve pumpkin decorating avoids all of that. A painted, wrapped or stacked pumpkin lasts through November, looks more designed than a face with triangle eyes, and does not require a knife, a bowl of slime or a garbage bag of pumpkin guts.
Here are no carve pumpkin decorating ideas for people who like layers and a little drama, with enough detail on materials, prep and timing that you can finish them in an evening.
Why no carve works better
A pumpkin starts to decline the moment it is cut, because the flesh is exposed to air, moisture and bacteria. An intact pumpkin keeps its skin as a barrier, so it can sit on a porch step or a mantel for weeks in cool weather. A few things follow from that:
- You can decorate early. Paint early and it should last well into November in cool, dry weather.
- You can bring it indoors. A painted pumpkin on a table has no mess, no smell and no mould.
- You can reuse it. A pumpkin painted in gold or cream fits fall, Thanksgiving and even early winter, so it is not a one-night thing.
- Kids and pets are safer. No blades and no flames inside a gourd.
- It suits the More lane. A layered display of painted, wrapped and stacked pumpkins is the kind of full, intentional arrangement that makes a porch or a table feel designed.
If you want to carve something, wait until the day before Halloween or the day itself. A pumpkin carved then will still look good on Halloween night.
Start with the pumpkins
Good decorating starts with a good pumpkin. At a farm stand or a grocery store, look for:
- A firm, dry, clean skin with no soft spots, cracks or mould.
- A sturdy stem. Never carry a pumpkin by the stem, which can snap and shorten the life of the fruit.
- A flat, stable base, since a rocking pumpkin is hard to paint and stack.
- A range of sizes and shapes. Tall, flat, round and warty ones give you variety. White, grey-blue, green and deep orange make a palette without paint at all.
Wipe each pumpkin with a damp cloth and let it dry fully before you decorate. Paint and glue will not hold on a dusty surface.
Painted pumpkins: three looks
Acrylic craft paint works well on pumpkins. Use a matte or satin finish, and apply thin coats so drips do not collect.
- Matte black and gold. Paint a pumpkin entirely in matte black, let it dry for an hour, then add a metallic gold stem or a thin band of gold at the base. It looks like ceramic and suits a moody mantel.
- Cream and clay. Paint a white or pale pumpkin in a soft cream, then add a few irregular strokes of terracotta with a dry brush. It feels like pottery, and it works from Halloween through Thanksgiving.
- Botanical. Use a pencil to sketch a simple branch or a few leaves, then fill with a small brush in dark green and rust. Add dots or stripes. It reads as folk art, and each one is a little different.
For a clean line, use painter’s tape to mark off a band or stripes, press the edges down, paint over it and peel it off while the paint is still slightly tacky.
Wrapped pumpkins: texture without paint
Wrapping is the easiest way to get a layered, textured look with no painting skills.
- Yarn or twine. Wind chunky yarn tightly around the pumpkin in rings, with a dab of glue at the start and end. Use two colours for stripes.
- Fabric. A square of lace, velvet or burlap laid over the pumpkin and tied at the stem with ribbon turns a plain pumpkin into a gift.
- Gauze or cheesecloth. Drape it loosely for a ghostly look. A little tea stain makes it look old.
- Paper. Torn pages from an old book or sheet music, glued on with a thin coat of craft glue and sealed with a clear matte layer, give a vintage feel.
Wrapped pumpkins are soft in the best way. They fit with the throws and cushions of a layered room, and they hold up well indoors.
Stacked pumpkins: height and drama
A single pumpkin on a step is nice. A stack of three is a statement.
- Choose a wide base, a medium middle and a small top. Stems should be dry and stable.
- Use a thin dowel or a long wooden skewer through the centre to hold the stack together, or a few dabs of strong craft glue between layers. Keep any skewer inside the stack and clear of kids, or use glue only. Make sure the stack is steady before you walk away.
- Mix finishes. A matte black base, a cream middle and a natural orange top look more interesting than three of the same.
- Add a crown. A sprig of dried grass, a handful of berries or a twig bundle fastened at the top gives the tower a finished look.
- Place stacks away from foot traffic. Wind and an excited dog will test them.
Putting it together on the porch or at home
Group by height. Place a stack on one side of the door, a cluster of three pumpkins on the other, and a few smaller ones on the steps. Repeat one colour or one finish across the whole display so it reads as one idea.
Indoors, use a tray, a cake stand or a wooden board as a base. Mix pumpkins with a few bare branches, a lantern, a pile of old books and a candle in a jar. The layers are the whole point. If you want a guide for building layered displays without clutter, see our Halloween porch lighting ideas for how to light them, and our maximalist Halloween decor ideas for the layering rules.
Safety and care
- Keep paint and glue away from small children and pets, and use non-toxic craft paint.
- Do not put real candles inside a painted or wrapped pumpkin. Paint, yarn and paper can burn. Use a battery light.
- Do not leave wrapped pumpkins in rain. Fabric, paper and yarn soak up water and may stain the porch. Move them under cover.
- Wash your hands after handling paint or glue.
What to do afterwards
Painted pumpkins can stay up through November. When they begin to soften, remove them. In most municipalities, plain pumpkins go in the compost or green bin, but pumpkins covered in paint, glue, yarn or paper should be stripped first or go in the garbage, depending on local rules, so check yours. Do not leave pumpkins in a park, a ravine or a forest, as it can harm wildlife and is often not allowed.
Less or More: your pumpkin plan
| Less | More | |
|---|---|---|
| Approach | One painted pumpkin per surface | Painted, wrapped and stacked in groups |
| Materials | Paint, a brush, a pencil | Paint, yarn, fabric, glue, a dowel |
| Time | 30 to 45 minutes | One or two evenings |
| Lifespan | Weeks | Weeks, if kept dry |
| Watch out for | Rushed brush strokes | Too many looks competing |
How to know the pumpkins are done
Choose one colour palette and no more than three finishes. If the display needs a sign to explain what is going on, it has too many ideas. Stop when every pumpkin has a neighbour that echoes it in colour, shape or texture.
For more ideas about building rooms and porches that feel full on purpose, visit the Maximalism hub, and see how a renter handles Halloween in our apartment decor ideas.
Free checklist: Less or More?
Not sure which lane fits your room or closet? Our free 2-page printable walks you through a one-hour room reset and a weekend closet sort, with a Less column, a More column and a stop rule for each. We will email it to you, free.


Leave a Reply